iPhone eSIM in 2026: Is Yours eSIM-Only, and How to Set It Up

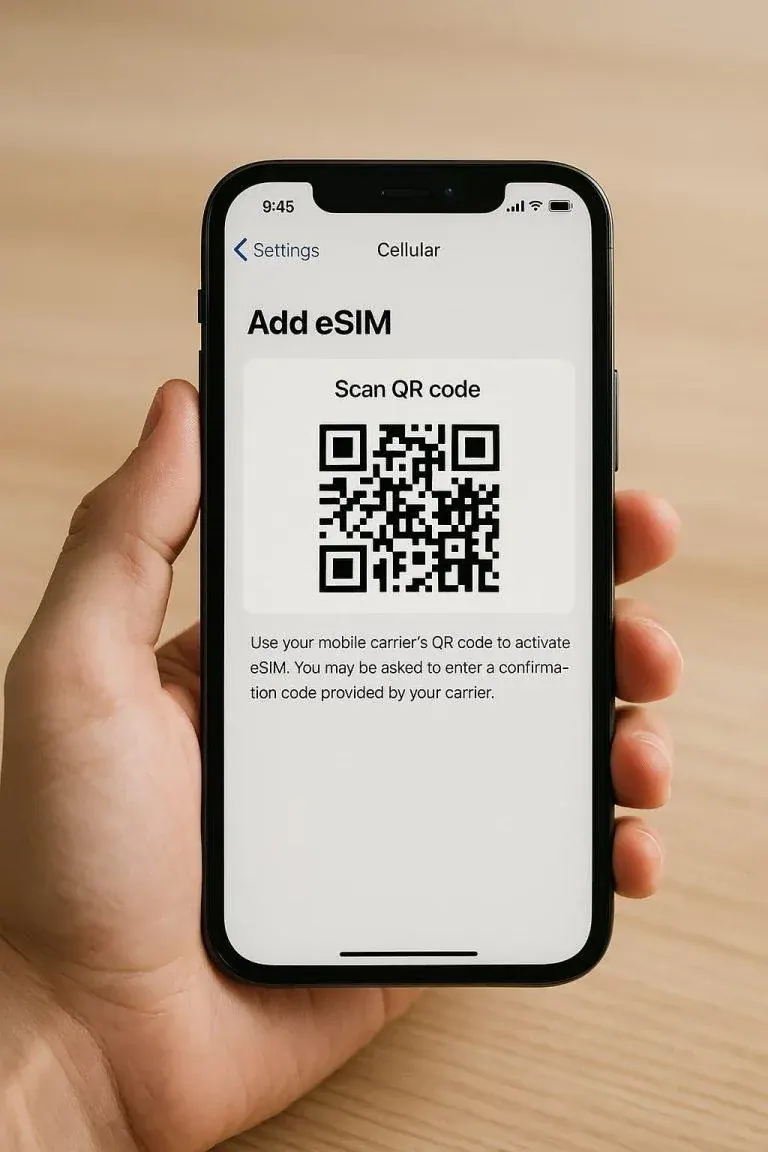
Flip your recent iPhone over and look along the edge for the SIM tray. On a lot of newer models, there isn't one. Apple started quietly removing it with the iPhone 14, and the iPhone 17 line pushed the idea further still. If that describes your phone, here's the reassuring part: it was practically designed for the way travel eSIMs work. You just need to know how to get online abroad, because slotting a local SIM into an airport-kiosk card is no longer an option.
This guide explains which iPhones are affected, why Apple made the change, and exactly how to stay connected on your next trip without a physical SIM. We'll also cover the parts people worry about most: keeping your home number, moving your eSIMs to a new phone, and what to do if something doesn't work the moment you land.
TL;DR
If your iPhone has no SIM tray, you can't use a local physical SIM abroad, and you don't need to. A travel eSIM does the same job. You buy it online, scan a QR code (or tap to install), and you're on a local network the minute you land.
Your phone can hold several eSIMs at once, so your home line and a travel plan share the same device comfortably. Install the travel eSIM before you fly while you've still got Wi-Fi, and switch it on when you arrive.
Which iPhones are eSIM-only?
It comes down to two things: the model, and the country where it was sold.
| iPhone | eSIM-only? | Notes |
|---|---|---|
| iPhone 14 / 15 / 16 (US models) | Yes, in the US | US models dropped the SIM tray starting with the iPhone 14 in 2022 |
| iPhone 17 / 17 Pro / 17 Pro Max | Yes, in 12 markets | Bahrain, Canada, Guam, Japan, Kuwait, Mexico, Oman, Qatar, Saudi Arabia, UAE, US, US Virgin Islands |
| iPhone 17 / 17 Pro / 17 Pro Max (elsewhere) | No | Europe, the UK, Australia, NZ, Singapore, South Korea and others keep a nano-SIM tray plus eSIM |
| iPhone 17 Air | Yes, worldwide | The ultra-thin model is eSIM-only everywhere, including China |
The fastest way to check your own phone: look for a tray on the edge of the device, or open Settings > General > About and see whether an EID number is listed. No tray means eSIM-only. An EID is simply the serial number of the embedded eSIM chip, and every eSIM-capable iPhone has one.
If you bought your phone in one country and you're a resident of another, the rule that matters is where it was purchased, not where you live now. A US-bought iPhone 16 is eSIM-only even if you carry it around Europe. That catches a lot of people out, especially anyone who picked up a phone on a trip to the States or bought one secondhand from abroad. When in doubt, the EID check settles it in seconds, and you can confirm device support on our supported devices page or in our does my phone support eSIM rundown.
Why Apple did this, and why it helps travelers
Pulling out the SIM tray frees up room inside the phone. Apple used that space for a bigger battery on the eSIM-only iPhone 17 models, worth up to about two extra hours of life, and on the iPhone 17 Air it was the only way to slim the body down to 5.6mm. Removing the tray also closes one more gap in the chassis, which helps with water and dust resistance.
The travel payoff is just as real. There's no tiny tray to lever open with a bent paperclip. No fiddly nano-SIM to drop on the floor of an airport bathroom. No swapping out your home SIM and hoping you don't lose it in a hostel somewhere. Your eSIMs live in software, and you manage all of them from Settings in a few taps.
There's a quieter security benefit too. A physical SIM can be popped out and slid into another handset by anyone who gets hold of your phone. An eSIM is locked to the device and protected by your passcode and Face ID, so it can't simply be lifted out and reused. If you've ever worried about losing your number along with your phone, the embedded approach takes that particular fear off the table. We dig into this further in our look at whether eSIMs are safe.
What eSIM-only means when you travel
The one genuine change: you can't grab a SIM card at an airport kiosk anymore. For years that was the traveler's safety net. On an eSIM-only iPhone, your real options abroad are these three:
- A travel eSIM. Bought online before or during your trip and installed in minutes. This is the simplest route, and the one these phones are built around.
- Home-carrier roaming. The most convenient and usually the priciest way to get data. Fine for a quick overnight, painful for a two-week trip.
- A local carrier's eSIM. Possible in some countries, but it often means in-person ID registration and a local payment method, which defeats the convenience.
For most trips the travel eSIM wins on both price and effort. You keep your home number live for calls and texts, and let the travel eSIM carry your data at local rates. If you want the full comparison of how these stack up against each other, our breakdown of eSIM vs SIM vs roaming lays it out side by side, and there's a focused guide on how to avoid roaming charges if that's your main concern.
How to add a travel eSIM to an eSIM-only iPhone
- Buy your destination plan online. You'll get a QR code (or an install link) by email.
- On Wi-Fi, open Settings > Cellular/Mobile Service > Add eSIM.
- Scan the QR code, or tap the install link if your provider offers one-tap setup.
- Label the line something obvious like "Japan trip" so you can find it later among your other eSIMs.
- On arrival, set the travel eSIM as your data line and keep your home line for calls and texts.
Because iPhones store multiple eSIMs, you can install a few trips' worth in advance and switch between them at each border without reinstalling anything. New to this? Our step-by-step eSIM install guide walks through it screen by screen, and if you've got an older phone you're unsure about, check eSIM compatibility first.
Dual eSIM and keeping your home line
This is the part that surprises people in a good way. Going eSIM-only doesn't mean you sacrifice your normal number. Your iPhone can store a stack of eSIMs and keep two of them active at the same time, which is exactly what you want abroad. Your home line stays switched on to receive calls, two-factor codes and messages, while the travel eSIM quietly handles all your data.
The setting that does the heavy lifting is your default data line. Once you arrive, open your cellular settings, choose the travel eSIM for "Cellular Data," and leave your home line set for calls. Turn off "Allow Cellular Data Switching" so your phone never silently falls back to your expensive home line if the travel signal dips for a moment. That one toggle saves more accidental roaming bills than anything else.
If you juggle plans across several countries on one trip, give each eSIM a clear label when you install it. Scrolling through a list of "Secondary," "Secondary 2," and "Business" at a train station in a country whose language you don't read is no fun. A name like "Italy June" tells you everything at a glance.
Moving your eSIM to a new iPhone
Upgrading your phone used to mean physically moving a SIM card across. With eSIMs the process is digital, and on recent iOS versions it's genuinely quick. When you set up a new iPhone next to your old one, the Quick Transfer flow can carry an eSIM across using Bluetooth, and many carriers let you move your line without ever contacting them. You confirm on both devices and the line lands on the new phone.
That said, transfer behavior depends on your carrier and on the eSIM provider. A travel eSIM you bought for a single trip may not transfer the same way a carrier line does, since some are tied to the specific device they were installed on. The safe habit is simple: before you wipe or sell an old iPhone, check whether each eSIM moved across successfully, and only delete a line from the old device once you've confirmed it's live on the new one. If a travel plan won't transfer, you can usually reinstall it from your provider account, which is why keeping your purchase confirmation handy matters.
If you're still on a phone with a tray and thinking about the jump, many carriers also let you convert a physical SIM to an eSIM right from settings, so your existing number becomes embedded before you even buy the new handset. It's a tidy way to get comfortable with the format ahead of an eSIM-only upgrade.
A few things to double-check before you fly
- Carrier unlock. Your iPhone must be carrier-unlocked to use a travel eSIM. Most are, but a phone still being paid off on a carrier instalment plan might be locked. You can confirm in Settings > General > About next to "Carrier Lock," which should read "No SIM restrictions."
- Your home line stays put. Adding a travel eSIM doesn't wipe your existing one. You run both side by side.
- Activation timing. Install early, but only let the plan activate once you arrive, so you don't burn validity days while you're still at home.
- Turn off data roaming on your home line. That's the line that would rack up expensive roaming charges. Leave roaming on only for the travel eSIM.
If something doesn't work when you land
Most of the time it just works, but here's a calm checklist for the moments it doesn't. First, make sure the travel eSIM is actually selected as your data line and that data roaming is switched on for that line (a travel eSIM needs roaming enabled because you're connecting to a foreign network). Second, toggle Airplane Mode on and off to force your phone to re-scan for local towers. Third, if you're still stuck, open your cellular settings and manually pick a network operator rather than letting the phone choose automatically.
A surprising number of "it's not working" cases come down to the eSIM not being installed before departure. If you wait until you've landed with no Wi-Fi and no home roaming, you may have no way to scan the QR code at all. That's the strongest argument for installing on Wi-Fi at home and only activating on arrival. For a deeper walkthrough of fixes, our guide on what to do when an eSIM isn't working covers the less obvious causes, and our eSIM myths vs facts piece clears up the common misunderstandings that lead people astray.
What about Android?
Apple gets the headlines, but the shift is industry-wide. Recent Google Pixel and Samsung Galaxy flagships ship with eSIM support too, and some markets are seeing eSIM-only or eSIM-first Android models. The same advice applies almost word for word: check for a tray, confirm your phone is unlocked, install your travel plan on Wi-Fi before you go, and keep your home line for calls. The menus are named slightly differently, but the logic is identical. The tray is on its way out across the whole industry, not just inside iPhones.
The bottom line
An eSIM-only iPhone isn't a problem to solve, it's a head start. The hardware already expects you to manage connectivity in software, which is precisely how a travel eSIM works. Buy your plan, install it before you fly, keep your home number for calls, and let the travel line do the data. No trays, no paperclips, no lost SIM cards in a hotel room.
Ready to get connected for your next trip? Browse Esim70 travel plans and install yours in minutes, long before you reach the gate.
Frequently asked questions
How do I know if my iPhone is eSIM-only?
Look along the edge of the phone for a SIM tray. If there isn't one, it's eSIM-only. You can also open Settings > General > About and check for an EID number, which every eSIM-capable iPhone lists. Remember that the country where the phone was sold matters: a US-bought iPhone 14 or later has no tray even if you use it elsewhere.
Can I still keep my normal phone number on an eSIM-only iPhone?
Yes. Going eSIM-only changes nothing about your home line. Your iPhone holds multiple eSIMs and keeps two active at once, so your home number stays live for calls and texts while a travel eSIM carries your data. You set the travel eSIM as your data line and leave the home line for everything else.
What do I do abroad if there's no SIM tray and no airport kiosk SIM?
Use a travel eSIM. You buy it online, get a QR code or install link by email, and add it through your cellular settings. The smart move is to install it at home on Wi-Fi before you travel, then activate it the moment you land. That way you're never stuck trying to get online with no connection to set things up.
Can I move my eSIM to a new iPhone?
Usually, yes. When you set up a new iPhone beside your old one, the Quick Transfer flow can carry an eSIM across over Bluetooth, and many carriers support moving a line without calling them. Transfer support varies by carrier and provider, though, so confirm each line is live on the new phone before you delete it from the old one. Some single-trip travel eSIMs may need reinstalling instead.
Do I need to turn on data roaming for a travel eSIM?
Yes, on the travel eSIM specifically, because it connects to a foreign network. Leave roaming switched off on your home line so it doesn't run up charges. Turning off "Allow Cellular Data Switching" also stops your phone from quietly falling back to your home line if the travel signal wavers.
Can I install a travel eSIM before my trip?
Absolutely, and you should. Install it while you still have Wi-Fi at home, label the line clearly, and only let the plan activate when you arrive so you don't waste validity days. iPhones store several eSIMs, so you can set up multiple trips in advance and switch between them at each border.
Is an eSIM as secure as a physical SIM?
In most respects it's more secure. An eSIM is embedded in the device and protected by your passcode and Face ID, so it can't be physically removed and slipped into another phone the way a SIM card can. That makes losing your number along with a stolen handset far less likely.
Convinced?
Try Esim70 — plans from $1.36/day
150+ countries · Instant delivery · No commitment.
Related articles
 ExplainersMay 12, 202611 min read
Is an eSIM Safe? Security and Privacy Explained (2026)
 ExplainersMar 24, 202613 min read
10 eSIM Myths vs Facts: What Travelers Get Wrong in 2026
 GuidesJun 26, 20269 min read
Canada Travel Requirements in 2026: eTA, Visas & Entry Rules
 TravelJun 26, 20267 min read
Best Places to Travel in December 2026